
Why Hiring an Experienced Web Developer Is Crucial for Website Success

As a Senior Web Developer and Team Lead with years of experience in ShopifyWordPress, and ReactJS, I’ve seen a clear difference between websites built by experienced developers and those made by freshers or vibe coders. Often, beginners focus on visual appeal and quick delivery but overlook key factors like SEO structurepage speedHTML semanticsimage optimization, and tag hierarchy. In this blog, we’ll explore why hiring an experienced developer can make or break your website, and how technical expertise directly impacts your brand’s online performance.

Experienced Web Developer Importance

Why an Experienced Developer Matters

Building a website is more than just arranging design elements — it’s about crafting a digital foundation that supports performanceSEO, and user trust. When websites are created by inexperienced developers, they often suffer from:

  • Slow Page Speed: Heavy images, unoptimized scripts, and unused code lead to slow load times, increasing bounce rates.
  • Poor SEO Visibility: Incorrect use of <h1>, missing alt texts, and bad HTML structure prevent search engines from ranking pages effectively.
  • Inconsistent User Experience: Broken layouts, unresponsive designs, and poor accessibility make users leave early.
  • Technical Debt: Messy or hard-to-maintain code causes issues when scaling or adding new features.

What Experienced Developers Do Differently

A professional web developer understands that a good website must look beautiful and perform beautifully. Here’s how their approach stands out:

1. Proper HTML Structure and Semantics

Experienced developers use correct HTML tags — <header><nav><main><footer> — ensuring both accessibility and SEO are maintained. Semantic HTML helps search engines understand content hierarchy, improving ranking and readability.

2. Optimized Performance and Page Speed

They optimize images (using WebP or AVIF formats), implement lazy loading, and minimize CSS/JS to reduce load time. They also track Core Web Vitals (LCP, CLS, INP) to ensure the website performs well on both desktop and mobile.

3. SEO-Ready Codebase

From meta descriptions to schema markup and clean URLs, experienced developers structure websites for better organic visibility. They know that SEO begins in the code — not after launch.

4. Accessibility and Usability

An experienced developer ensures the site is usable for all audiences — including those relying on assistive technologies. Proper alt textscolor contrast, and keyboard navigation improve user experience and compliance.

5. Maintainability and Scalability

Professionals write clean, modular, and documented code that’s easy to maintain. They plan folder structures, naming conventions, and version control (Git) for smooth collaboration and future updates.

Common Mistakes by Fresher Developers

During code reviews and interviews, I’ve noticed recurring mistakes that slow down websites or affect SEO:

  • Overusing <div> tags instead of semantic HTML.
  • Skipping alt attributes for images and meta tags for pages.
  • Using large, uncompressed images that reduce site speed.
  • Ignoring mobile responsiveness and cross-browser testing.
  • Relying heavily on plugins or external libraries without optimization.

How an Experienced Developer Benefits Your Business

Hiring a skilled developer is not just about better design — it’s about business growth. Here’s how expertise directly impacts performance and conversions:

  • Higher SEO Rankings: Clean code and correct tag usage help Google understand and rank your website better.
  • Better User Retention: Fast, responsive websites keep visitors engaged and build trust.
  • Reduced Maintenance Cost: Future updates become smoother, reducing long-term technical debt.
  • Improved Conversion Rates: A faster, optimized site increases leads and sales.
  • Professional Reputation: A polished website reflects brand credibility and boosts client confidence.

Tips for Fresher Developers to Improve

If you’re a fresher trying to grow as a web developer, here are some actionable tips:

1. Learn the Fundamentals

Focus on HTML semanticsCSS optimization, and JavaScript basics. Frameworks change, but strong fundamentals make you adaptable.

2. Understand SEO Basics

Learn how search engines work. Use proper meta tagsalt texts, and heading hierarchy (H1–H6). This knowledge will make your code SEO-friendly by design.

3. Optimize for Performance

Always compress images, minify CSS/JS, and use browser caching. Tools like Google Lighthouse and PageSpeed Insights help analyze performance issues.

4. Stay Updated with Web Standards

Follow blogs and communities that share insights on performanceCore Web Vitals, and SEO. Implement small improvements regularly to stay ahead.

5. Learn from Code Reviews

Accept feedback from senior developers. Code reviews are your best chance to understand real-world standards and improve faster.

Final Thoughts

A website is the first impression of your business. When built by an experienced developer, it performs better, ranks higher, and lasts longer. Beginners may create something that “works,” but professionals build something that performs. If you want your business website to be fast, SEO-friendly, and scalable — experience matters.

Looking to build or revamp your website? Reach out — I’ll help you create a fast, SEO-optimized, and scalable web presence.
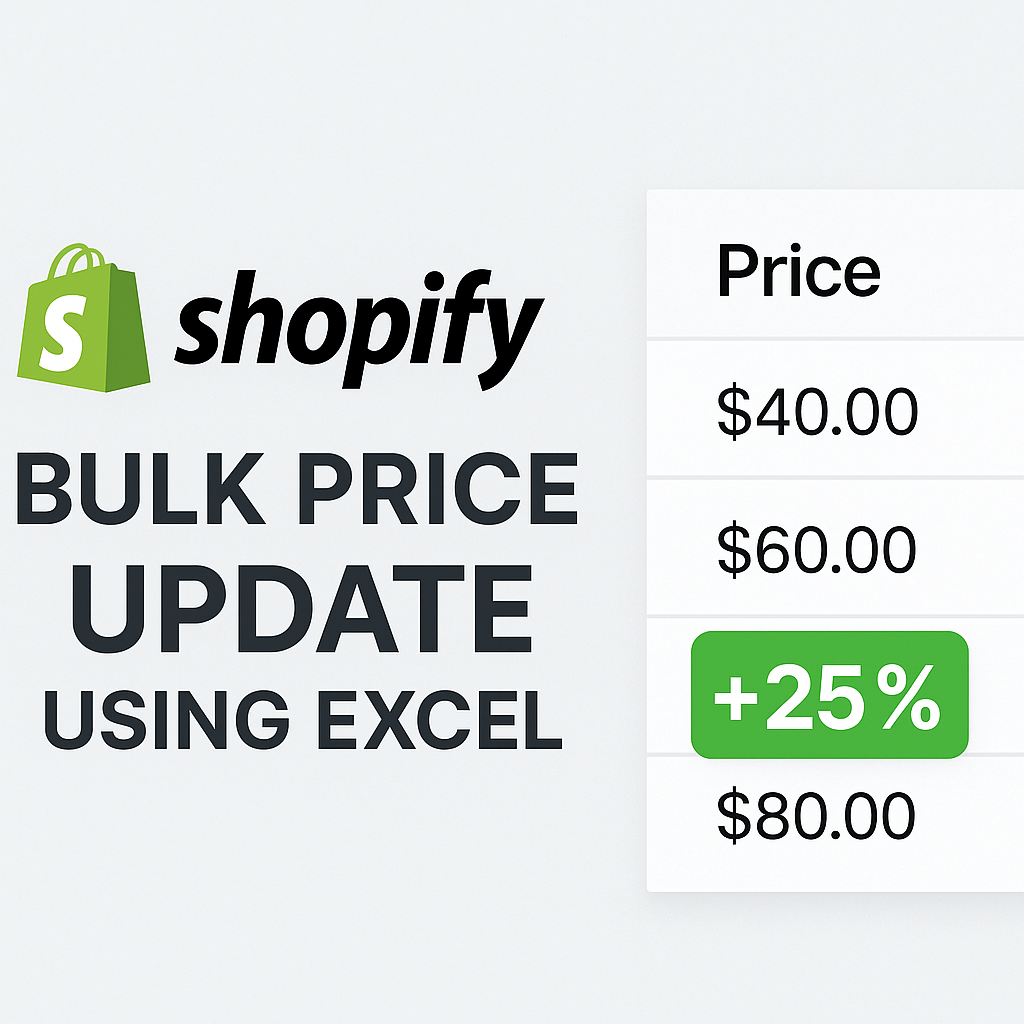
How to Easily Update Product Prices in Bulk on Your Shopify Store

Are you managing a Shopify store and need to update product prices in bulk? As a web developer and full stack developer, I recently tackled this challenge and found an efficient solution using Excel and Shopify’s import/export feature. Additionally, I leveraged React JS to create a custom web application that streamlines the process.

In this blog, I’ll guide you through increasing product prices by 25% using Shopify’s CSV feature and show how React JS JavaScript can transform your Shopify website management. Whether you’re a website developerfront end web developerweb designer, or store owner, these methods will save time and reduce manual work.

Why I Needed a Bulk Price Update (and How Shopify Helped)

A client needed a 25% price increase across all products on their Shopify website. Manually editing each product in Shopify Admin was impractical and error-prone. Shopify’s CSV export/import feature was a lifesaver, and as a full stack developer, I saw an opportunity to enhance this with a ReactJS JS-powered web application for future updates.

Step-by-Step: Update Prices in Bulk Using Excel

1. Export Your Products

From your Shopify Admin panel:

  • Go to Products.
  • Click Export (top-right corner).
  • Select All products and export as CSV for Excel.

2. Edit Prices in Excel

Open the CSV file and locate the Variant Price column.

  • Use an Excel formula to increase prices by 25%, for example:
  • =ROUND(A2*1.25, 2) (Assuming A2 is the price cell).
  • Drag the formula down to update all prices.

3. Save and Re-import the CSV

After updating prices:

  • Save the file as a CSV (UTF-8 recommended).
  • Navigate to Products > Import in Shopify.
  • Upload the updated CSV and confirm changes.

Building a React JS Tool for Shopify Price Updates

As a front end web developer, I developed a custom web application using React JS to simplify bulk price updates. With JavaScript in React, I created a dashboard that connects to Shopify’s API, fetches product data, and allows users to apply percentage-based price changes. The tool generates an updated CSV file ready for import, all within a polished interface designed by a web designer.

Here’s a basic example of how React JS JavaScript can be used to fetch and update prices:

  • Use ReactJS JS to create a component that displays product data.
  • Implement an input field for percentage increases (e.g., 25%).
  • Use JavaScript in React to calculate new prices and export them as a CSV.

This web application is ideal for website developers managing large Shopify websites. It reduces manual work and ensures accuracy, making it a must-have for any full stack developer.

Pro Tips for Smooth Price Updates

  • Always back up the original CSV to prevent data loss.
  • Test updates on 1–2 products before applying to all.
  • Use spreadsheet filters to target specific product groups.
  • For web developers, automate CSV generation with React JS to handle recurring updates.
  • As a web designer, ensure your web application interface is intuitive and matches your Shopify website’s branding.

Why React JS is a Game-Changer for Shopify Stores

React JS empowers front end web developers to build dynamic, scalable tools for Shopify websites. With React JS JavaScript, you can create reusable components, such as price adjustment forms or product data visualizations. These tools handle large datasets efficiently, perfect for stores with thousands of products. For web designersReactJS JS allows styling that aligns with your store’s aesthetic, enhancing the admin experience.

As a website developer, I’ve used JavaScript in React to integrate real-time price previews, ensuring store managers can review changes before applying them. This level of control is invaluable for any Shopify website.

Advanced Shopify Management for Web Developers

For full stack developers, combining React JS with Shopify’s API opens endless possibilities. You can build a comprehensive web application to manage not just prices but also inventory, discounts, and product descriptions. React JS JavaScript enables real-time updates, so changes reflect instantly in your Shopify website’s admin panel.

Website developers can also create custom workflows, like scheduling price updates or syncing data with external systems. As a front end web developer, I’ve found that ReactJS JS makes these tools accessible and user-friendly, even for non-technical store owners.

Final Thoughts: My Go-To Methods for Shopify Stores

The CSV method is my go-to for quick price updates, but as a web developer, I’ve shifted toward React JS-based solutions for scalability. Whether you use Excel or build a web application with React JS JavaScript, these approaches are fast, accurate, and developer-friendly. For web designers, styling these tools to match your Shopify website adds a professional touch.

If you’re a website developerfront end web developer, or store manager, try these methods to streamline your workflow. Experimenting with JavaScript in React could unlock new potential for your Shopify website. Have questions or need help with your store or React JS development? Drop a comment or contact me!

Why Fresher Developers Learn Tailwind CSS but Switch to Bootstrap

As a Senior Web Developer and Team Lead with over seven years of experience specializing in ShopifyReactJS, and WordPress, I’ve mentored and interviewed countless fresher developers and seasoned professionals. A recurring pattern emerges: many freshers dive into Tailwind CSS during their learning phase, drawn to its flexibility and modern appeal, only to pivot to Bootstrap once they enter the workforce. I experienced this myself—starting with Tailwind’s utility classes to build sleek personal projects, I later adopted Bootstrap to meet workplace demands. Why does this career transition occur? In this blog, I’ll unpack the reasons behind this shift in front-end development, analyze the strengths of both CSS frameworks, and offer practical tips to help freshers thrive in the competitive job market.

Bootstrap and Tailwind CSS frameworks for web design

Why Freshers Love Tailwind CSS

Tailwind CSS, launched in 2017, has revolutionized web design with its utility-first approach, allowing developers to style directly in HTML using pre-defined utility classes (e.g., bg-blue-500p-4). This eliminates the need for extensive raw CSS, making it a game-changer for fresher developers. Here’s why Tailwind is a favorite among beginners:

  • Portfolio Building: Tailwind empowers freshers to create pixel-perfect designs that stand out in portfolios. For example, I used Tailwind to build a responsive e-commerce mockup with custom animations, which impressed recruiters during my early job applications.
  • Modern Resources: Online tutorials and bootcamps heavily feature Tailwind, especially its seamless integration with JavaScript frameworks like ReactVue, and Next.js. This aligns with the modern web development stack, making it accessible for beginners.
  • Web Performance: Tailwind’s purge feature removes unused styles, resulting in lightweight, high-performing websites. For instance, a portfolio site I built with Tailwind had a CSS bundle under 10KB, boosting web performance and SEO.
  • Creative Freedom: Unlike traditional frameworks, Tailwind doesn’t impose pre-designed components, allowing freshers to craft unique custom UIs. This flexibility is ideal for experimenting with interactive web apps, such as dashboards or landing pages.

As a fresher, I was drawn to Tailwind’s ability to quickly prototype responsive designs without wrestling with CSS. It felt like a superpower for building visually stunning personal projects, from single-page apps to portfolio showcases.

Why Workplaces Choose Bootstrap

Bootstrap, introduced in 2011 by Twitter, remains a cornerstone of enterprise projects due to its robust ecosystem of ready-made components (e.g., navbars, modals, carousels). Its focus on development speed and consistency makes it a go-to choice for teams, prompting freshers to switch. Here’s why Bootstrap dominates professional settings:

  • Rapid Prototyping: Bootstrap’s pre-built components enable developers to deliver minimum viable products (MVPs) quickly. In my early career, I used Bootstrap to spin up a Shopify storefront in days, meeting tight client deadlines.
  • Legacy Systems: Bootstrap’s extensive browser support, including older browsers like Internet Explorer, makes it indispensable for legacy projects. I encountered this on a government portal project where Tailwind’s modern approach wasn’t viable.
  • Learning Curve: Bootstrap’s comprehensive documentation and familiar grid system make it easy for teams to onboard new developers. This is critical in fast-paced team workflows where consistency matters.
  • Standardization: Bootstrap’s predefined styles ensure uniformity across large teams. For example, in a WordPress project, Bootstrap’s component library helped maintain a cohesive look across multiple developers’ contributions.

While Tailwind offers flexibility, Bootstrap’s structure and speed make it a practical choice for enterprise environments. I shifted to Bootstrap early in my career to align with team needs, a move many freshers replicate.

What Interviews Reveal

Over the years, my interviews with fresher developers and industry professionals have shed light on this transition. Here are key insights:

  • Fresher Struggles: A recent graduate shared, “I loved Tailwind for my portfolio—it made my React app look unique. But my first job required Bootstrap to churn out client dashboards quickly.” This reflects the pressure to prioritize speed in professional settings.
  • Expert Tips: A senior developer I mentored advised, “Bootstrap gets your foot in the door because it’s everywhere; Tailwind CSS keeps you relevant by letting you innovate.” This dual approach is key to long-term success.
  • Hiring Trends: Job listings for ShopifyWordPress, or Drupal roles frequently list Bootstrap as a requirement. A quick scan of job boards like LinkedIn shows over 60% of front-end roles mentioning Bootstrap, compared to 20% for Tailwind.
  • Team Dynamics: A team lead I spoke with noted, “Bootstrap’s conventions reduce onboarding time for freshers, which is critical for Agile sprints.” This explains why companies favor it for collaborative projects.

My own transition to Bootstrap for a Shopify team echoed these sentiments. The need for development speed and compatibility with existing systems outweighed Tailwind’s customization benefits.

Tips for Fresher Developers

Navigating the job market as a fresher requires balancing personal growth with employer expectations. Here’s an expanded guide to mastering both CSS frameworks and building a standout career:

1. Start with Bootstrap for Job Readiness

Begin with Bootstrap to align with industry demands. Focus on its grid system, ready-made components, and theming capabilities. Practice by building a WordPress blog or a landing page with Bootstrap’s navbar and carousel. This will prepare you for roles requiring rapid delivery, such as Shopify or Drupal development.

2. Add Tailwind CSS for Portfolio Excellence

Use Tailwind CSS to create visually striking portfolio projects that showcase your creativity. For example, build a React dashboard with Tailwind’s utility classes, incorporating animations and responsive layouts. These projects will differentiate you in interviews, highlighting your ability to craft pixel-perfect designs.

3. Master CSS Fundamentals

Frameworks are tools, not substitutes for core skills. Deepen your understanding of CSS concepts like flexbox, grid, media queries, and responsive design. For instance, practice recreating a Bootstrap component using raw CSS to grasp its inner workings. This versatility will make you adaptable to any framework.

4. Stay Updated with Industry Trends

Follow developer tools and communities on platforms like X to stay informed about hiring trends and framework updates. Engage with posts about front-end development to learn which skills are in demand. For example, recent X discussions highlight growing interest in Tailwind for startups, while Bootstrap remains king in enterprises.

5. Experiment with Hybrid Approaches

Explore combining Bootstrap and Tailwind in a single project to leverage their strengths. For instance, use Bootstrap’s grid for layout consistency and Tailwind for custom styling. I tested this approach on a React app, achieving both speed and uniqueness, which impressed a client during a freelance gig.

Final Thoughts

The shift from Tailwind CSS to Bootstrap reflects a practical balance between customization and development speed. Like many freshers, I moved from Tailwind’s creative freedom to Bootstrap’s efficiency to meet workplace needs. To succeed, master Bootstrap for the job market, leverage Tailwind for portfolio building, and ground yourself in CSS fundamentals for long-term growth. As the front-end development landscape evolves, staying adaptable is key. Have questions about ShopifyReact, or breaking into the industry? Reach out—I’m happy to help!

Why Should You Use Microsoft PowerToys for Development? (Boost Productivity on Windows!)

Are you a web developer or full stack developer looking to optimize your workflow and enhance productivity? Microsoft PowerToys is a must-have toolkit for Windows users, especially for front end web developerswebsite developers, and web designers. Packed with powerful productivity tools and Windows utilities, PowerToys streamlines tasks, boosts coding efficiency, and integrates seamlessly into your development process, whether you’re building a Shopify website or a custom web application with React JS.

In this blog, we’ll explore the benefits of Microsoft PowerToys, highlight its best features for developers, and show how React JS JavaScript can extend its functionality for website development. Let’s dive into how these developer tools can supercharge your workflow!

What is Microsoft PowerToys? (A Free Toolkit for Developers)

Microsoft PowerToys is an open-source collection of Windows utilities designed to enhance the user experience with advanced features and customization options. From window management to quick app launching and keyboard shortcuts, PowerToys is a game-changer for web developers and full stack developers working on web applications or Shopify websites. Its developer tools make tasks like coding, debugging, and UI design more efficient, especially when paired with JavaScript in React.

Best Microsoft PowerToys Features for Developers

1. FancyZones – Advanced Window Management

Struggling to manage multiple windows while coding a website? FancyZones lets you create custom window layouts, making multitasking effortless for front end web developers.

Benefits for Developers:

  • Snap windows into predefined zones for organized coding.
  • Arrange editors, browsers, and terminals for React JS projects.
  • Restore saved layouts instantly to maintain coding efficiency.

2. PowerToys Run – A Faster Application Launcher

PowerToys Run is a powerful search and app launcher that speeds up navigation, saving time for website developers.

Why Developers Love It:

  • Quickly open IDEs, files, or ReactJS JS project folders.
  • Perform instant calculations or search for web application resources.
  • Use plugins to extend functionality for Shopify website tasks.

3. Color Picker – Grab Color Codes Instantly

For web designers and front end web developers, Color Picker captures colors from any screen element, perfect for designing Shopify websites or web applications.

Key Features:

  • Pick colors from web pages, images, or React JS components.
  • Get HEX, RGB, and other formats for CSS or UI design.
  • Copy colors instantly for website styling and graphics.

4. Keyboard Manager – Customize Keyboard Shortcuts

Optimize your workflow with Keyboard Manager, which lets you remap keys and create custom shortcuts for coding efficiency.

How It Helps:

  • Assign shortcuts for frequent React JS JavaScript tasks.
  • Reduce keystrokes for faster web application development.
  • Adapt to different keyboard layouts for full stack developers.

5. File Explorer Add-ons – Enhanced File Previews

Working with JSON, Markdown, or SVG files? PowerToys enhances File Explorer with previews tailored for website developers.

Benefits:

  • Preview ReactJS JS code files without opening an editor.
  • View JSON and Markdown for Shopify website configurations.
  • Save time browsing web application project directories.

6. Text Extractor – Copy Text from Anywhere (OCR Tool)

Text Extractor lets you extract text from images or error messages, a lifesaver for web developers debugging web applications.

Why It’s Useful:

  • Copy error messages from screenshots for React JS debugging.
  • Extract text from locked PDFs or UI elements in Shopify websites.
  • Speed up documentation and bug reporting for website projects.

Extending PowerToys with React JS for Web Developers

As a full stack developer, I’ve explored using React JS to create custom PowerToys extensions. With JavaScript in React, you can build a web application to interact with PowerToys utilities, such as a dashboard for managing FancyZones layouts or automating Keyboard Manager shortcuts. For example, a React JS JavaScript tool could let front end web developers save and switch window layouts for different website projects, enhancing productivity tools.

Here’s how ReactJS JS can enhance PowerToys:

  • Create a web application to visualize and manage PowerToys settings.
  • Use React JS components to display real-time Color Picker data.
  • Automate repetitive tasks with JavaScript in React for Shopify website workflows.

This approach is ideal for website developers and web designers looking to integrate PowerToys into their web application development pipeline.

How to Install Microsoft PowerToys (Step-by-Step Guide)

Ready to boost your coding efficiency? Here’s how to install PowerToys:

  1. Download the latest release from the Microsoft PowerToys GitHub.
  2. Install the application and launch it from the system tray.
  3. Configure tools like FancyZones or Color Picker to suit your React JS or Shopify website workflow.

Pro Tips for Web Developers Using PowerToys

Maximize PowerToys’ potential with these tips tailored for web developers:

  • Use FancyZones to create layouts for React JS JavaScript debugging, with separate zones for code, browser, and terminal.
  • Customize PowerToys Run plugins to launch web application scripts or Shopify website tools.
  • Leverage Color Picker for consistent website branding across ReactJS JS components.
  • Combine Text Extractor with JavaScript in React to automate error logging in web applications.
  • As a web designer, use File Explorer Add-ons to preview UI assets for Shopify websites.

Why PowerToys is a Must-Have for Full Stack Developers

For full stack developers, PowerToys integrates seamlessly into complex workflows. Whether you’re building a Shopify website, coding a web application with React JS, or designing UI with React JS JavaScript, PowerToys’ developer tools save time and reduce friction. Website developers can use PowerToys to manage multiple projects, while web designers benefit from tools like Color Picker for pixel-perfect designs.

By combining PowerToys with ReactJS JS, you can create custom productivity tools that streamline repetitive tasks, making it easier to deliver high-quality websites and web applications.

Final Thoughts: Why Developers Should Use PowerToys

Microsoft PowerToys is an essential toolkit for web developersfront end web developers, and full stack developers. With features like FancyZones for multitasking, PowerToys Run for quick access, and Color Picker for UI design, it significantly boosts coding efficiency. For website developers and web designers, integrating React JS with PowerToys unlocks new possibilities for custom web applications and Shopify website management.

Have you used Microsoft PowerToys or built extensions with JavaScript in React? Share your favorite feature or React JS JavaScript tips in the comments, or contact me for help with your website or web application!

The Future of Shopify Development: Trends to Watch in 2025

Shopify continues to dominate the eCommerce trends landscape, adapting to emerging technologies and evolving consumer behaviors. As we approach 2025, web developersfull stack developers, and front end web developers must stay ahead of key Shopify development trends to build competitive Shopify websites. By leveraging tools like React JS and modern web applications, developers can meet rising customer expectations and enhance user experiences.

In this blog, we’ll explore the top trends shaping Shopify website development, from headless commerce to AI personalization, and how React JS JavaScript empowers website developers and web designers to create cutting-edge solutions.

1. Headless Commerce: Elevating Customization and Performance

Headless commerce decouples the front-end presentation from back-end eCommerce functionality, offering unmatched flexibility for Shopify websites. Shopify’s Hydrogen and Oxygen frameworks, built with React JS, enable front end web developers to create custom storefronts that deliver fast, dynamic, and personalized experiences.

Benefits of Headless Commerce:

  • Enhanced Performance: Optimized loading speeds boost engagement and conversions.
  • Design Flexibility: Use JavaScript in React or Vue.js for unique, brand-specific designs.
  • Omnichannel Integration: Seamlessly connect across platforms for a consistent website experience.

For full stack developersReactJS JS in Hydrogen allows rapid development of scalable web applications, making headless commerce a cornerstone of modern Shopify development.

2. AI-Powered Personalization: Crafting Unique Customer Journeys

AI personalization is transforming eCommerce, and Shopify’s “Shopify Magic” tools help website developers automate tasks like product descriptions and discounts. By integrating React JS JavaScriptweb developers can build dynamic web applications that leverage AI for tailored shopping experiences on Shopify websites.

AI Applications in Shopify:

  • Product Recommendations: AI suggests products based on user behavior, increasing sales.
  • Chatbots and Virtual Assistants: AI-driven support enhances customer interactions.
  • Dynamic Pricing: Real-time pricing adjustments optimize profitability.

Front end web developers can use React JS to create responsive AI-powered components, ensuring seamless integration into Shopify websites.

3. Expansion into B2B Commerce: Tapping into New Markets

Shopify’s enhanced B2B features cater to wholesale and bulk transactions, empowering website developers to build robust Shopify websites for business clients. Full stack developers can integrate custom web applications using ReactJS JS to streamline B2B operations.

Key B2B Features:

  • Custom Pricing: Set personalized pricing for different client segments.
  • Bulk Ordering: Simplify large-volume purchases for businesses.
  • ERP Integration: Ensure data consistency with existing systems.

Web designers can use JavaScript in React to create intuitive B2B dashboards, enhancing the user experience on Shopify websites.

4. Enhanced Checkout Experience: Reducing Friction to Boost Conversions

A seamless checkout process is vital for reducing cart abandonment. Shopify’s Shop Pay offers fast, secure payments, boosting conversions by up to 50%. Front end web developers can use React JS to customize checkout flows, ensuring a polished website experience.

Checkout Innovations:

  • One-Click Payments: Speed up transactions for users.
  • Multiple Payment Options: Support digital wallets and installment plans.
  • Mobile Optimization: Ensure smooth checkouts on all devices.

React JS JavaScript enables web developers to build responsive checkout components, aligning with mobile-first design trends.

5. Integration of Augmented Reality (AR) and Virtual Reality (VR): Immersive Shopping Experiences

AR and VR technologies enhance Shopify websites by offering immersive experiences like virtual try-ons and 3D product views. Full stack developers can integrate AR/VR using ReactJS JS, creating engaging web applications that reduce return rates.

Advantages of AR/VR Integration:

  • Enhanced Product Visualization: Customers make informed decisions.
  • Increased Engagement: Immersive experiences differentiate brands.
  • Reduced Returns: Accurate expectations lower return rates.

Web designers can use React JS to style AR/VR interfaces, ensuring a cohesive Shopify website aesthetic.

6. Progressive Web Apps (PWAs): Bridging the Mobile Experience Gap

Progressive Web Apps (PWAs) combine web and mobile app features, offering fast, reliable experiences. Shopify’s PWA support allows website developers to create app-like web applications using React JS JavaScript.

Benefits of PWAs:

  • Improved Performance: Fast loading and offline functionality.
  • Cost-Effective Development: More economical than native apps.
  • Increased Reach: Accessible via browsers, expanding audience reach.

Front end web developers can leverage JavaScript in React to build PWAs that enhance Shopify website performance.

7. Sustainability and Ethical Commerce: Aligning with Consumer Values

Sustainability is a growing priority for consumers. Shopify’s tools help website developers integrate carbon offsetting and ethical sourcing into Shopify websites, appealing to eco-conscious shoppers.

Sustainable Initiatives:

  • Carbon Offsetting: Neutralize shipping emissions.
  • Ethical Sourcing: Verify and showcase product origins.
  • Transparent Reporting: Share sustainability efforts with customers.

Web designers can use React JS to create sustainability-focused UI components, enhancing brand transparency.

8. Mobile-First Design: Catering to the On-the-Go Shopper

With mobile traffic dominating, mobile-first design is critical. Shopify’s mobile-optimized themes ensure smooth navigation and fast load times, vital for Shopify websitesFront end web developers can use ReactJS JS to build responsive interfaces.

Mobile-First Advantages:

  • Improved UX: Seamless navigation for mobile users.
  • Faster Load Times: Optimized for mobile performance.
  • Higher Conversions: Mobile-friendly designs boost sales.

React JS JavaScript empowers web developers to create adaptive layouts for mobile-first design.

9. Leveraging React JS for Shopify Development

React JS is a powerhouse for Shopify development, enabling full stack developers to build custom web applications and storefronts. With JavaScript in React, developers can create dynamic components for AI recommendations, AR/VR interfaces, or PWA functionalities, enhancing Shopify websites.

  • Build headless storefronts with ReactJS JS and Hydrogen.
  • Create AI-powered product recommendation widgets using React JS JavaScript.
  • Develop mobile-first PWAs for seamless website experiences.

Web designers can style these components to match brand aesthetics, ensuring a cohesive Shopify website.

10. Developer Tips for Staying Ahead in Shopify Development

Website developers and front end web developers can maximize Shopify’s potential with these tips:

  • Use React JS to prototype headless commerce solutions quickly.
  • Integrate AI APIs with React JS JavaScript for personalized web applications.
  • Optimize Shopify websites for mobile-first design using ReactJS JS.
  • Experiment with Shopify’s AR/VR tools to create immersive website experiences.
  • Automate B2B workflows with custom web applications built in React JS.

Final Thoughts: Shaping the Future of Shopify Websites

The future of Shopify development lies in embracing eCommerce trends like headless commerce, AI personalization, and mobile-first design. For web developersfull stack developers, and web designers, tools like React JS and React JS JavaScript unlock endless possibilities for building innovative Shopify websites and web applications. By staying ahead of these trends, you can create websites that captivate customers and drive conversions.

Have insights on Shopify website trends or ReactJS JS tips? Share in the comments or contact me for help with your web application or Shopify development!